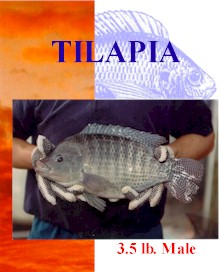
Tilapia are a hardy, fast growing fish with a good (less fishy) taste ideal for warm areas or indoor heated tanks. They are somewhat boney and can be slightly difficult to clean.
The most important thing to know about Tilapia is that there are many types, with wildly different characteristics. For example, the Mosambique breed like salt more than other tilapia.
And even within one type of Tilapia, the nutritional value of the fish will vary wildly depending on what they were fed. For example, if they are fed primarily corn they will contain more Omega 6 (harmful) than Omega 3 (helpful) fatty acids^. Fish grown on flax based feeds will be high in Omega 3s and low in Omega 6's.^ ^ Even for one individual Tilapia, the ideal temperature and diet will vary over the fish's lifetime.
Very complete information on care, feeding, treatment, and diagnosis is available: Tilapia Health Diagnosis and Treatment Advice
Temperature: Every breed of Tilapia is different, but most Tilapia prefer temperatures of 77 to 86'F (25-30'C) and will not thrive or grow at lower temperatures. Some may tolerate temperatures as low as 47'F (8 or 9'C) for short periods (overnight). In an area where the temperature, at least through the growing season, is high enough to maintain water temperature in the preferred range, they may be grown outside in a pond. During very hot weather, ventilate or plant shade type water plants. Over-winter a few smaller fish in an indoor aquarium to serve as breeders next spring if the winter temperature will be too low. In areas where pond water is too cold, Tilapia will need to be grown in tanks, barrels, or above ground pools which are insulated from the earth and heated or enclosed in a green house or tent. See: Tilapia Aquaculture Environment: Temperature
Space: The size of the pond should be determined by the number of fish you want to raise. A good guide is 4 to 5 square feet of water per mature fish or 2-3 mature fish per square meter of water surface in a pond environment. In aquaculture or aquaponics, a more crowded environment can help keep the aggressive males from becoming territorial: No fewer than 3 fish per 50 gallons, and up to 12 adult fish can be contained in a 55 gallon drum. The water depth in any environment should be more than 3 feet or one meter; never less than 2.5 feet (three-fourths meter) deep. The water should be still and not flowing so if a stream or river is used, the pond should be separated from the flowing water. Exposure to sunlight is very important both to maintain temperature and to promote the growth of green food such as algae. See: Site Selection and Engineering
Salinity: They grow well up to salinities of 16 to 20 parts per thousand (sea water is 35 ppt). Salt can be added to discourage pests and to create a warmer layer in a deep pond during the winter. It can also help to control overpopulation: Fry numbers decline substantially at 10 ppt salinity. See: Tilapia Aquaculture Environment: Salinity
Water Quality: No water filtration is typically required in a pond; water hyacinth can remove enough pollutants. In an aquaponics system, a bio-filter and regular water changes of about 20% per week or 10% twice a week are enough to maintain water quality in an established system. Unlike many other fish, Tilapia can eat algae so green water is not a bad sign; some manure and sunlight can provide additional "free" food without damaging the fish.
Chlorine must be removed from the new water by adding either commercial de-chlorination chemicals or 1000mg Vitamin C per 100 gallons water. If the water is treated with Chloramine^ then a special commercial chemical made to remove chloramine must be used or the water must be left to stand at least 24 hours after de-chlorination to allow the ammonia still present to dissipate. A bubbler in the water will accelerate the process. Tilapia are tolerant of more ammonia in their water than most pond fish, but they have limits. Chlorine and Ammonia test kits are expensive, but recommended especially when starting or when conditions or behavior changes. Ammonia test kits can be found at pet stores that sell fish. Chlorine test kits are available for less at pool supply stores. The cost can be reduced by testing only half the water and half the test chemicals.
See: Tilapia Aquaculture Environment, Water Quality
Breeders: If fingerlings are unavailable, you need about 20-30 pairs of good breeders to start reproducing in breeding pond of 10 x 20 feet. Stock 1:3 or 1:4 male to female. The bottom of the breeding pond must consist of lime or compost, about 16% Tilapia spawn every 7 to 8 weeks. Eggs hatch in 2 to 5 days and the female guards the young for an additional 8 to 10 days.
Fingerlings: If fingerlings are available, you will need to plan on about 5 to 6 fingerlings per square meter of water surface area. The most common breeds of tilapia available are: Nilotica, Mozambique, and GIF (genetically modified). Fingerlings need large amounts of protein and will become canabilistic if unsatisfied. Feedings of grub, bugs, flies, worms are helpful.
Before stocking the pond with tilapia, be sure to drain it thoroughly and remove the weeds and unwanted fish that may be present. Allow your pond to dry up until it cracks before refilling with fresh, clean water.
Fertilize the pond one week before stocking. Apply chicken manure on the pond bottom with water depth of about 6 centimeters at the rate of one kilo for every lo square meters. Fertilize the pond once a month to insure good production of algae.
Stock the pond either early in the morning or late in the afternoon when the water temperature is low in order to avoid weakening of the fish. Allow the water in the pond to mix gradually with the water in the fish container before putting the fish into the pond. For more, see: Pond Preparation and Management.
Maintain the natural blue green algae and Plankton by adding more fertilizer. Place 5 lbs (2.5 kg) of chicken droppings in each of several sacks and suspend in the water at every corner of the pond. The sack slows the release, preventing excessive oxygen depletion during decomposition. Supplement feeds with greens, duckweed, flax, wheat germ, fine rice bran, bread crumbs, eggs, earthworms, grubs, termites, and others at an initial rate of 5% of the total body weight of the fish. Avoid feeding more than the fish will eat in one session.
Plant shade type water plants during hot weather, but do not totally cover the pond with plants as this will interfere with the natural food production process. Other good plants include duckweed.
Overpopulation will slow the growth of the older fish; there are many non-chemical methods of reducing "recruitment" (the production of offspring) and some may even provide additional benefits. Fry numbers decline substantially at 10 ppt salinity. One method, which mimics nature, is the use of very low quantities of predatory fish to "pick off" excess fingerlings and sick adults. Possible predators include:
While the production and consumption of the fingerlings by the predators does reduce the yield of the crop fish, the predators may also be used as food fish or to feed other producing stock such as Chickens.
Disease and Treatment: See: HAMES: Practical diagnosis and advice
Harvesting is best done when the winter is near or some other factor means that the fish are unlikely to survive or unlikely to grow more. Fish can also be harvested whenever they are large enough to be of use, or on an as needed basis. There are several methods of quickly killing the fish, but chilling in an ice bath is the least violent and takes very little time. Tilapia have very strong scales and skin, so a very, very sharp knife is needed. A protective metal or thick leather glove is a good idea. Since they are covered in a protective "slime" they should be held down with a towel. Using a knife or kitchen scissors, cut from the anus toward the head to release the internal organs and scoop them out into a waste container. Clean the knife and the fish in running water, then start a cut at the tail, up along the top of the fish on one side of the spine, and then back down just behind the gill and under the front fin. Pry the side off while cutting along the ribs with downward strokes to sure as much of the meat is removed as possible. The carcass is ideal for soup stock with vegetables, bay leave, and perhaps rice. The fillet can then be turned over, and the skin separated by holding it with pliers and again making downward strokes with the knife against the inside of the skin to ensure as much meat is retained as possible.
Of course, there are many ways to cook tilapia, but a light coating in flour, with some salt and pepper, sauted in olive oil for just one minute on each side is easy, quick, and delicious. Do not overcook! Served with a slice of lemon and tartar sauce or capers.
Most tropical fish, including Tilapia, grow best above 80'F. If they need heat, and the water filter needs a UV stage, why not add an open air solar water heater to do both? A shallow tray with black backing over which the water is pumped may raise the temperature even without a cover. In colder areas, a thin cover of UV transparent plastic may be required. Most PMMA, Acrylic, and other UV "resistant" materials will pass UV; they are resistant because they do not absorb UV energy. A wind pump can be used to move water through the panel, but a solar PV powered electric pump makes more sense as it will automatically run when the sun is out.
Tilapia can live in fresh or salt water... That might allow us to raise the temp by making the pond a solar salt pond. In an ordinary pond, the sun’s rays heat the water and the heated water from within the pond rises and reaches the top but loses the heat into the atmosphere. The net result is that the pond water remains at the atmospheric temperature. The solar pond restricts this tendency by dissolving salt in the bottom layer of the pond making it too heavy to rise.
Another suggestion (thanks bbob) is just covering the pond with a clear material (like plastic or glass) to retain heat. In a high activity (read: kids) area, glass might be broken, but bbobs idea of just floating bubble wrap on it is pure brilliance! And it will keep a little air on the surface of the water under the plastic.

Studies 1 with some species of tilapia show that "monoculture" (male only) ponds do not produce significantly higher yields than "mixed" (male and female) ponds.
From The Perfect Fish http://www.aquanet.com/features/tilapia/perfectfish.htm
Since "everyone knows" that female tilapia grow slower than male tilapia, scientists came up with a method of treating all of the tilapia fingerlings with male hormones so those fish that would have been female now turn out to be male. Then all of the fish in the growing tanks or ponds will be male, and the average growth rate will be higher than it would have been with half males and half females.Now even the US government supports the use of reversal techniques by allowing all of the tilapia hatcheries who wish it to participate in what is known as an INAD. This basically means they have the right to put chemicals into the food of the fish that are not yet cleared as being safe, as long as they send results in to the government.
Almost every tilapia grower now uses hormone-treated fingerling tilapia. This basically reduces the time it takes to get the tilapia through the growing stage and hopefully allows for slightly higher profits from the sale of the fish since a farmer can grow more each year.
The truth is, however, that the only tilapia that grow faster if they are treated with methyl testosterone are the of the "pure line" species. These are produced by breeding, say, males of tilapia nilotica to female tilapia nilotica. If hybrids are produced using t. nilotica and T. aurea or T. mozambique and T. hornorum, any females that are produced will tend to grow as fast as the original male tilapia in the pure line species.
Ocean Rich, Tilapia hatchery and farm in Thermal, California, ph (760)397-7302, fax (760)397-6101
Scientific American article by C.F. Hickling, "The Cultivation of Tilapia,"
Also:
See also:
http://www.tilapiahybridpair.com TILAPIA HYBRID PAIRS FOR SALE! These Hybrid are a cross between Male Rocky Moutain White,and Female O.mossombica (Mike Sipes Strain). Male or Female 3 Fish Minimum 1" $10.00 ea. 1.5" $12.00 ea. 2" $14.00 ea. 2.5" $16.00 ea. 3" $18.00 ea. 3.5" $20.00 ea. 4" $22.00 ea. *Shipping included* tilapiahybridpair.com tilapiahybridpair@yahoo.com Send Check or money order to: Don Turner 3603 Cedarwood Court Bettendorf, Iowa 52722 563.332.9444
Questions:
Comments:
Other related topics as suggested by Google +
Code:
| file: /Techref/other/pond/TilapiaRaising.htm, 24KB, , updated: 2022/5/4 09:27, local time: 2025/10/8 20:45,
216.73.216.38,10-9-11-127:LOG IN
|
| ©2025 These pages are served without commercial sponsorship. (No popup ads, etc...).Bandwidth abuse increases hosting cost forcing sponsorship or shutdown. This server aggressively defends against automated copying for any reason including offline viewing, duplication, etc... Please respect this requirement and DO NOT RIP THIS SITE. Questions? <A HREF="http://www.piclist.com/techref/other/pond/TilapiaRaising.htm"> Tilapia Raising, Tilapia freshwater fishpond, Backyard Tilapia.</A> |
| Did you find what you needed? |
|
o List host: MIT, Site host massmind.org, Top posters @none found - Page Editors: James Newton, David Cary, and YOU! * Roman Black of Black Robotics donates from sales of Linistep stepper controller kits. * Ashley Roll of Digital Nemesis donates from sales of RCL-1 RS232 to TTL converters. * Monthly Subscribers: Gregg Rew. on-going support is MOST appreciated! * Contributors: Richard Seriani, Sr. |
|
Ashley Roll has put together a really nice little unit here. Leave off the MAX232 and keep these handy for the few times you need true RS232! |
.