
It seems that one of the main issues with a printer hack is that new printer models are being released to market all of the time, making it hard for moders to have a consistent model to use and to adopt proven mods.
I took the punt with the cheapest of the 4 colour models. The new Epson T20. This printer is sold new in Australia for $48 so if after buying the printer if could not be modified I'd have a cheap colour printer.
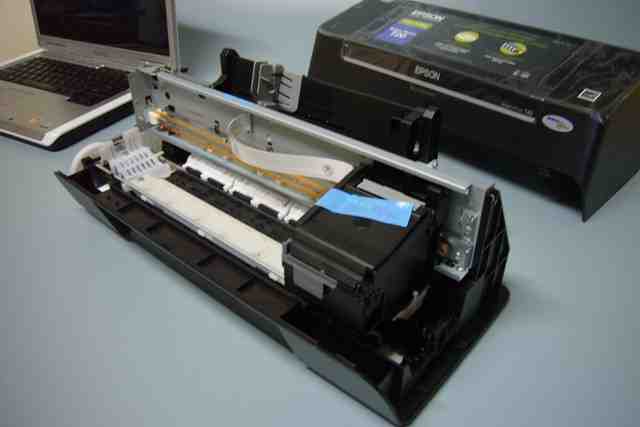
The Epson T20 with the cover off - remove two screws and unclip in 5 locations with a little flexing of the cover over the paper feed.
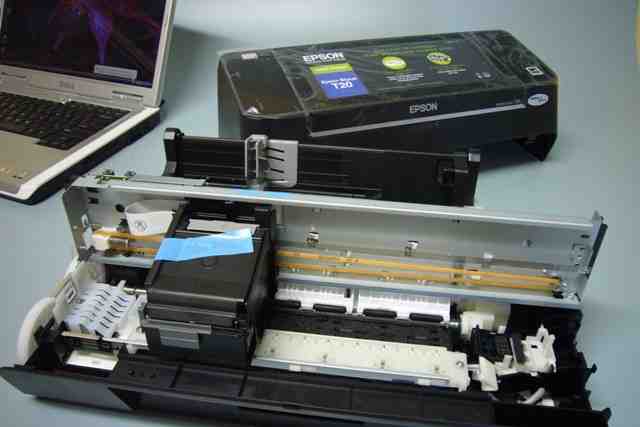
To my surprise, with the cover off, this printer looked quite straight forward to modify as the printer head carrier and drive was simply mounted on the plastic printer body on two location pegs and vertical slots.
The hard part would be to hack the body to accept a new feed tray and to modify the head cleaner (or so I thought).
A note to fidlers like myself. If you remove the head cleaner and don't clip is back in properly the printer will not work! Don't ask how I found this out, but after 3 hrs of trying to figure out why we could not clear a "General Printer Error", one click fixed it and the printer would then run through its starting sequence. The head cleaner basically stoped the head from homing properly.
A quick test print to make sure the "new" printer worked and then it was out with the tools to convert this baby!
The body of the T20 is a complex injection moulding which at first made fitting a new feed system look a little difficult. As it turned out, the kind design engineers at Epson included some very nicely located mounting locations. All you have to do is remove all that unwanted plastic. A few hours with the trusty dremel, hobby saw and files the body was hacked to accept a new feed tray.
As it turned out, the paper feed mechanism mounts and the rear horizontal web are at the same level and 12mm below the level of the feed roller. So a piece of 12mm thick MDF would make the perfect new infeed tray.
To secure the MDF infeed tray I added a new aluminium angle bracket and some slotted holes. I want to be able to fit the cover of the printer back on so the tray will need to be able to be fitted after the cover. Note the holes trough the bottom of the body to allow for screw driver access.
The print head carrier was remounted with some spacer washers under the lower screws. The head as been raised 1.8mm at this stage.
The paper sensor was a bit of an issue as I was hoping to use the original setup, but to no avail. It took a little trial and error to get the printer to print a test page. The timing between starting the feed rollers and the printer "seeing" the paper is quite critical. Until the cutout in the paper was just right the printer would simply spit out the paper with an error. [ed: after finding the correct position... ] The paper sensor has been mounted into the MDF tray. I milled a slot and press fit the slot sensor into it. The pressure rollers have been modified to allow the pcb to pass through. Just having drive on the outer edges of the carrier seems adequate at this stage.
The cover was relatively easy to modify, just cut out the back and cut some material of the push buttons and push button guides as these hit the raised print head carrier. The USB connector bezel was simply removed.
I am really quite surprised by the accuracy of the paper timing through the printer. I have printed the same circuit on paper several times on the same paper and the placement is spot on. Gives me a little confidence that double sided pcb would be possible.
Questions:
Scott - Great tips thanks. I have just attempted to do the same thing with an Epson T21 which appears to be identical to the T20, hardware-wise at least. However getting the offset between the paper feed sensor and the rollers is driving me crazy. I have spent several days on this but seem no closer to a solution. Are you able to advise on the offset (in cm) you used or give any other info to get the printer to accept the paper feed? Thanks. Martin C+
http://www.youtube.com/results?search_type=&search_query=team+jones+dtg+printer&aq=f Hey nice work Scott! I'm trying to convert one to a direct to garment printer, but the paper sensor has me screwed up - heres what I've done so far (check the link) can you tell me how to set up the sensor so it will print? thanks mate.+
hi were a student from the philippines and trying to do exactly what you were doing. were modifying a t-10 epson printer. btw can you show how can we contact you? we need your help. :D contact me ewgf_alucard@yahoo.com thx+
Comments:
| file: /Techref/pcb/etch/t20-sa.htm, 11KB, , updated: 2013/5/2 15:15, local time: 2025/10/23 01:46,
216.73.216.114,10-3-244-150:LOG IN
|
| ©2025 These pages are served without commercial sponsorship. (No popup ads, etc...).Bandwidth abuse increases hosting cost forcing sponsorship or shutdown. This server aggressively defends against automated copying for any reason including offline viewing, duplication, etc... Please respect this requirement and DO NOT RIP THIS SITE. Questions? <A HREF="http://www.piclist.com/techref/pcb/etch/t20-sa.htm"> PCB Resist, InkJet Printing, Epson T20, by Scott A</A> |
| Did you find what you needed? |
|
o List host: MIT, Site host massmind.org, Top posters @none found - Page Editors: James Newton, David Cary, and YOU! * Roman Black of Black Robotics donates from sales of Linistep stepper controller kits. * Ashley Roll of Digital Nemesis donates from sales of RCL-1 RS232 to TTL converters. * Monthly Subscribers: Gregg Rew. on-going support is MOST appreciated! * Contributors: Richard Seriani, Sr. |
|
Ashley Roll has put together a really nice little unit here. Leave off the MAX232 and keep these handy for the few times you need true RS232! |
.