Case making
of Ultrasonic Range Meter
I introduce the way of making the case which used the acrylic board in this page. I used "Bending apparatus-2" to bend the acrylic board. The case is composed of the three parts.
 (1) to (8) shows the order to bend. The following explanation shows the process which I did this time. You need not to have to follow this process. Try in your free idea. The point is to make the prank of the construction by the error of the manufacture as little as possible. The size after bending the acrylic board is sometimes different from the planned size. (The cover make not never close.) 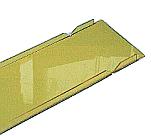 Bend the reinforcement part in both sides.(1),(2) It is difficult to bend from behind when not bending this part first. If the part to bend with "Bending apparatus-2" becomes soft, bend on the quickly flat board, being right-angled and wait to get cold just as it is for a while. 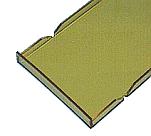 Next, bend the top of the back panel(Part which installs the cover).(3) This part concerns whether or not to be able to close the cover levelly. Bend as correctly as possible. It is for difficulty after bending the part of the bottom board that it bends this part earlier. 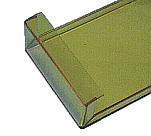 Lastly, bend the bottom board side of the back panel.(4) This part is related with the installation of the cover, too. Bend as correctly as possible. The width of the front panel makes fit the inside of the reinforcement part on both sides of the bottom board. It had better cut after the manufacture of the part of the bottom board ends. 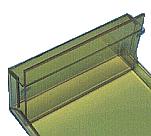 After bending the side of the bottom board, arrange with the back panel and confirm the bend position with the top.(5) 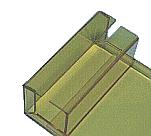 Bend the top.(6) This part is related with the installation of the cover, too. Bend as correctly as possible. Confirm whether or not it fits the height of the back panel after bending. If different, redo the adjustment after warming up once again by "Bending apparatus-2". 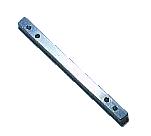 The fixation of the cover is done at the top of the front panel and the back panel. I used the aluminum stick in the 6-mm corner which opened the female screw of 3 mm with the tap to fix the cover. 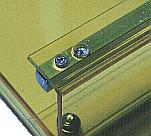 The aluminum stick in the 6-mm corner is put to the front and the back panel using the plate screw of 2 mm. The top of the hole which lets through the plate screw is shaved for the head of the screw to be buried with the about 5-mm drill. Be careful so as not to make a 5-mm hole. With this, the cover and the head of the screw don't bump. Make the part of the cover last including the cutting of the board. Do the cutting and the bend according to the size of the bottom board, the back panel and the front panel.  Put the front panel to the 10-mm position from the tip of the bottom board. 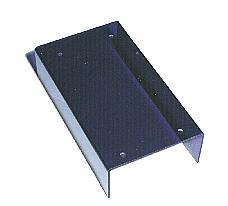 Cut the part of A of the cover according to the size of the bottom board. Even if there is a prank in this part little, it doesn't influence the construction of the case too much. When the size of the board is big, the part of B isn't cut yet. When there is not leeway in the size, cut before bending because it is difficult to be cut from behind. Bend the side part and the top part of the one.(7) Adjust the bend angle for the side part and the top part to fit with the front and back panel. Decide the position of the side part of the remainder and bend it.(8) This shape becomes the final form of the cover. Adjust the bend angle to fit the front and back panel. Cut the part which is unnecessary when there is leeway in the board.(B) 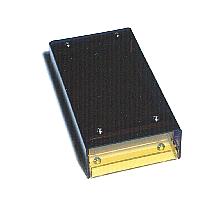 The case was made by the above process. |
||||||||||||||||||||