Let's try (4)
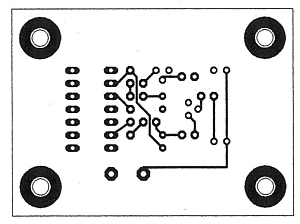
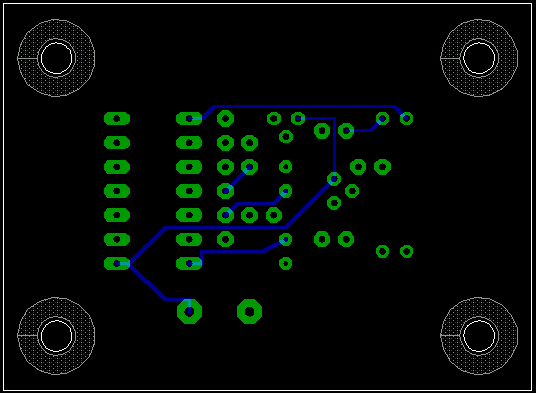
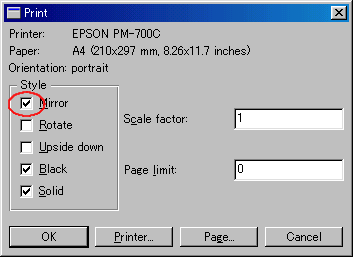
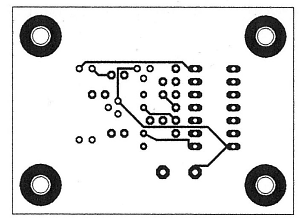
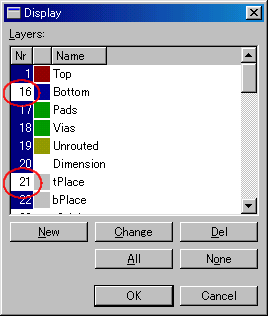 Choose "Display/hide layers..." from the pull-down menu of View of the menu bar on the board window and it makes display Display window. Click the number of "16 Bottom" and "21 tPlace" at least and it makes OFF. "Bottom" is a pattern display control for wiring side. This time, it makes OFF because it is unnecessary. "tPlace" is the display control of the shape and the name of the parts. These are unnecessary too. Choose "Display/hide layers..." from the pull-down menu of View of the menu bar on the board window and it makes display Display window. Click the number of "16 Bottom" and "21 tPlace" at least and it makes OFF. "Bottom" is a pattern display control for wiring side. This time, it makes OFF because it is unnecessary. "tPlace" is the display control of the shape and the name of the parts. These are unnecessary too.Because "1 Top" is a component side pattern, it makes ON. Because "17 Pads " is the installation hole of the board, it makes ON. "20 Dimension" is the display control of the edge of the printed board. When making OFF, the line of the edge can be erased. This time, I decide to draw the line of the edge. To erase the pattern of the installation hole, it makes from 39 to 43 OFF. When making 16 and 21 OFF, it becomes only a component side pattern as follows. 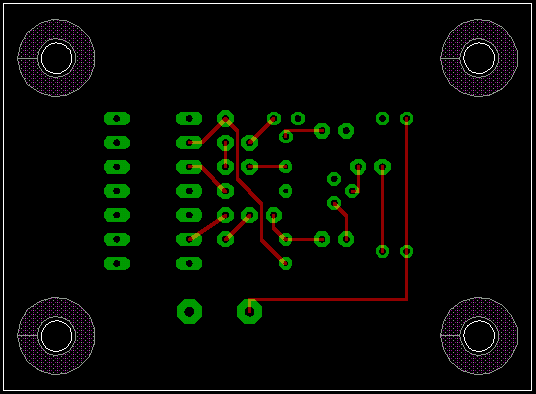 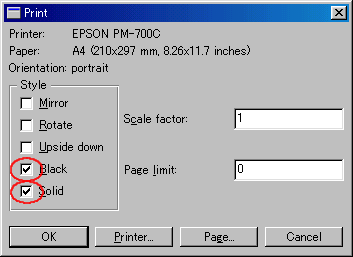 When clicking File -> Print of the menu bar, a dialog like the left is displayed. It puts mark to Black and Solid. Black is the designation to print out a pattern blackly. Solid is the designation which makes a pattern around the installation hole black. When not marking on Solid, around of the hole is printed out grayly. The others are the following designation. Mirror is the designation which makes either side opposite. Rotate is the designation to make the 90-degree left turn a pattern. Upside down is the designation which makes the top and the bottom opposite. It marks above-mentioned item according to need. It is possible to make these designation by "Print setup...". It is printed as follows with the printer.
 This time, I printed to the white paper. An actual mask pattern is printed on the OHP(Over Head Projector) sheet.  Next, it prints the mask pattern for the wiring side. It opens Display window, and it makes "16 Bottom" ON and it makes "1 Top" OFF. This time, only the wiring side shows.
  It prints a wiring side with Mirror designation. In case of the OHP sheet, because it is clear, to make either side opposite isn't necessary. It is printed as follows with the printer.
 A mask pattern was printed by above procedure. After that, the printed board can be made with the way of "Making ofthe Double sided printed board". In above explanation, the default value of EAGLE was used about the thickness of the wiring and the size of pads and so on. The wiring is thin and the size of pad is quite little. When doing a printed board in hand-made, it is necessary to change various setting. The purpose of this page is the introduction of the basic usage of EAGLE. |