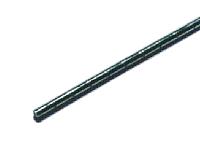
Through-hole pin Through-hole pin
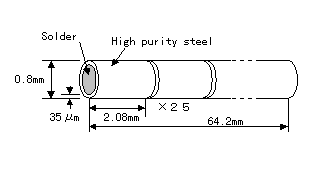
The Sanhayato company is selling that I am using. It becomes like the lead of a mechanical pencil. With the pipe that the outside diameter is 0.8 mm, the material is the high purity steel which plated the tin. The thickness of the pipe is 0.35-µm.
The carving is put in the 2.08-mm interval(for the one through-hole) at the 64.2-mm length. The one lead is composed in the 25 through-holes.
The solder is filled into the pipe. After setting the through-hole on the printed board, the soldering becomes easy. The solder is sucked up after setting the pin and the inside becomes hollow.
Inserter
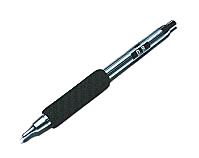
This is a mechanical pencil itself. The through-hole pin is used instead of the lead of the pencil.
I think that the tip becomes robust little because it bends on either side when setting the through-hole pin on the printed board and it breaks the pin.
It sets on the printed board while knocking the knob with the top and taking out the pin for the one.
Automatic punch
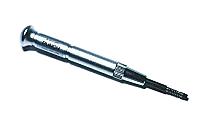
The through-hole pin which was set on the printed board using the inserter protrudes from the printed board. Also, it comes immediately because it doesn't stick to the hole.
Therefore, it beats from above and it makes stick to the printed board.
When pushing this automatic punch from above, the lock inside comes on the way and can beat the through-hole pin with the tip of the punch.
The small hammer can be used instead of this punch. As for beating too strongly, it is worthless. Beat from the component side, the wiring side, both and make the through-hole pin level with the printed board.
Pedestal for the press
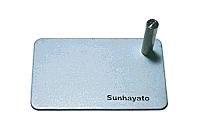
This is the pedestal when beating the through-hole pin with the punch. It is OK if being the board of the firm metal.
The one of the column is the one to make the pedestal when wanting to make the through-hole at the printed board which had mounted the component.(It doesn't use too much). It is possible to remove. You work on the flat pedestal part if being before mounting the component.
Solder sucker
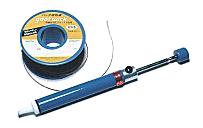
After setting the through-hole pin on the printed board, solder the print pattern and the through-hole pin.
After that, the hollow through-hole is complete when sucking up the solder by the solder sucker.
It is OK even if it uses either of the solder pump, the desoldering wire.
I am using the desoldering wire.
|